If you’re anything like me and love to install operating systems from scratch to keep them running optimally, you probably quickly realized that Apple OS X Mavericks isn’t as easy as it was before to create a HDD or USB-bootable disk image. I’ve used both of these methods successfully to perform a clean install.
Once you download the 6GB installer from the App Store, you have a couple options to stay sane.
Using Terminal, combined with the ‘sudo’ command, is quite powerful. Additionally, if you use a USB drive for this, all of its contents will be deleted. You risk data loss by following these steps — but you probably won’t.
1. Easy: Use DiskMaker X to be guided into making a bootable USB stick. It’s free and is simple to use: http://diskmakerx.com
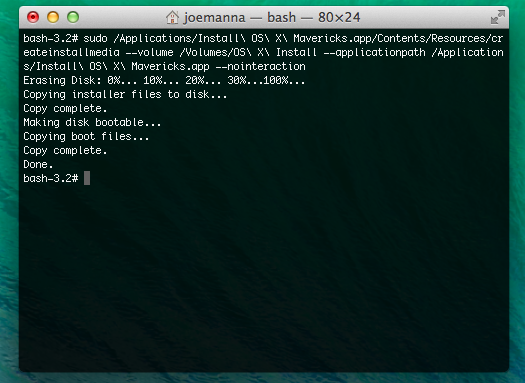
2. Advanced: Create a separate partition (I’ve always done this) named* ‘OS X Install’. Then fire up a terminal, type ‘sudo bash’ and authenticate. Then copy and paste this command in it:
sudo /Applications/Install\ OS\ X\ Mavericks.app/Contents/Resources/createinstallmedia --volume /Volumes/OS\ X\ Install --applicationpath /Applications/Install\ OS\ X\ Mavericks.app --nointeraction
* I named my other partition this way. You can name it anything you want. For spaces, you need to escape them with the backslash.
The total time it took to make this install image was about 45 seconds on an SSD hard drive. Reboot, hold the ‘option’ button on boot and your other partition will boot into the Mavericks installer.
I originally posted this on Google Plus, but I figured it’s a good fit for my blog and published it here for you.

